


Have you ever felt stuck because you don’t have a bench or a full gym setup at home? I’m Dr. Muhammad Usman Arif, and while my clinical work centers on men’s sexual health and wellbeing, I deeply understand how physical fitness, body confidence, and overall health connect to every part of life. Today, I want to guide you through something that might seem unrelated at first—a complete back workout using only dumbbells—but trust me, the principles of building strength, honoring your body’s limits, and working with what you have apply to every health journey.
A dumbbell-only back workout offers accessibility that gym machines simply can’t match. You need minimal equipment, limited space, and less than half an hour. Yet the results—strength, muscle definition, and better back control—can be transformative. This isn’t just about aesthetics. A strong back supports posture, reduces pain, and builds confidence that radiates into every area of your life.

The core philosophy here mirrors what I tell my patients every day: form over force. Whether you’re managing a sensitive lower back or simply starting your fitness journey, the right technique protects you while delivering real results. Moreover, this approach empowers people who feel limited by space, budget, or physical concerns. You don’t need perfection. You need consistency and care.
Can you imagine how good it feels to finish a workout in your living room and know you’ve done something meaningful for your body? That’s what we’re building here. Let’s get started.
Who This Workout Is Designed For
This workout speaks directly to specific people with specific needs. First, it’s designed for individuals training at home without a bench. Perhaps you live in a small apartment, or maybe you prefer privacy while exercising. Either way, this routine meets you where you are.
Second, it targets people with limited equipment—specifically, those who only have dumbbells available. You don’t need a cable machine, a pull-up bar, or fancy attachments. Two pairs of dumbbells are enough. One lighter pair for control-focused movements and one slightly heavier pair for strength-building exercises give you everything you need.
Third, this workout serves viewers looking for a short, efficient back session. Time is precious. Twenty minutes of focused work beats an hour of distracted effort. Furthermore, if you’re juggling work, family, or other commitments, this structure respects your schedule while delivering results.
Fourth, this routine prioritizes those who need to emphasize technique due to lower back sensitivity. I know firsthand how chronic lower back discomfort changes everything. When your back hurts, heavy lifting becomes risky. This workout uses manageable weights and controlled movements to protect your spine while building strength safely.
Finally, fitness enthusiasts seeking back definition and strength will find value here. You don’t have to be a beginner. Even experienced lifters benefit from stripping away complexity and focusing on pure muscle engagement. Therefore, regardless of your current level, this workout offers something meaningful.
💡 Pro Tip: If you’ve been avoiding back workouts because of past pain, start lighter than you think you need to. Building confidence in movement matters more than ego lifting.
Equipment and Workout Setup
Dumbbells Required
You need two pairs of dumbbells to complete this workout effectively. One lighter pair handles exercises requiring precision and control, such as reverse flies and upright rows. One slightly heavier pair supports compound movements like bent-over rows and deadlifts.

Choosing manageable weights protects your lower back from unnecessary strain. I’ve seen too many people—both in fitness and in my clinical practice—push too hard too fast and end up sidelined by injury. Consequently, I always recommend starting conservatively. You can always increase weight later, but you can’t undo an injury overnight.
How heavy should your dumbbells be? The lighter pair might range from 5 to 15 pounds, depending on your current strength. The heavier pair could be anywhere from 15 to 35 pounds or more. However, these are guidelines, not rules. Your body will tell you what’s appropriate. If you can’t maintain form, the weight is too heavy. If you feel nothing after 30 seconds of work, you might need to go slightly heavier.
Space and Environment
This workout requires only a small workout area. You don’t need a dedicated home gym or even a full room. A cleared space in your living room, bedroom, or garage works perfectly. No bench or machines are required, which removes a major barrier for most people.
The routine combines floor-based and standing movements only. Some exercises, like dumbbell pullovers and renegade rows, are performed lying down. Others, like bent-over rows and deadlifts, are done standing. This variety keeps the workout engaging while targeting different parts of your back comprehensively.
Additionally, ensure your floor surface is stable and non-slip. A yoga mat or exercise mat provides cushioning and grip, especially for plank-based movements like renegade rows. Beyond that, you’re ready to go. Simplicity is the point.
Workout Structure Overview
Time and Format
The total workout time is just 20 minutes. This includes everything: warm-up, main session, and post-workout stretching. The interval structure is straightforward—30 seconds of work followed by 30 seconds of rest. This format maximizes efficiency while allowing adequate recovery between exercises.
Why 30-second intervals? This duration is long enough to fatigue the target muscles but short enough to maintain good form throughout. Similarly, 30 seconds of rest prevents complete recovery, keeping your heart rate elevated and your muscles engaged. Over time, this approach builds both strength and muscular endurance.
Session Breakdown
The workout divides into three distinct phases. First comes the warm-up phase, which prepares your muscles, joints, and nervous system for the work ahead. Skipping this step increases injury risk and reduces performance, so don’t rush through it.
Next is the main workout session, where the real muscle-building happens. This phase includes compound movements, isolation exercises, and hybrid lifts that challenge your back from multiple angles. Each exercise targets specific muscle groups while maintaining full-body engagement.
Finally, post-workout stretching and mobility work ensures you recover properly. Stretching reduces muscle tension, improves flexibility, and supports long-term joint health. Neglecting this phase might not hurt you today, but over weeks and months, it can lead to tightness, imbalance, and discomfort. Therefore, commit to all three phases equally.
🔥 Pro Tip: Set a timer for each interval. This removes guesswork and keeps you accountable. Your phone’s timer works perfectly.
Warm-Up Phase: Preparing the Back Safely
Purpose of the Warm-Up
The warm-up increases blood flow to your muscles, which delivers oxygen and nutrients while removing metabolic waste. This process literally warms your tissue, making it more pliable and less prone to tears or strains. Additionally, warming up reduces injury risk by preparing your shoulders, spine, and lats for the demands ahead.
Think of your muscles like cold rubber bands. When cold, they snap easily. When warmed, they stretch and contract smoothly. The same principle applies to your body. A proper warm-up transitions you from rest to work safely and effectively.
Arm Circles
Start with arm circles, moving forward and backward. Focus on controlled, relaxed movement rather than speed or intensity. This exercise warms your shoulders, chest, and upper back while promoting blood flow through your arms.
Breathe naturally throughout. Don’t hold your breath or rush the motion. The goal is to wake up your body, not exhaust it. Perform these circles for about 30 seconds in each direction, keeping your movements smooth and deliberate.
Torso Twists
Next, perform torso twists from right to left with gentle rotational movement. This exercise targets your lats and spine, preparing them for the rotational stability required during rowing movements. However, avoid aggressive twisting, especially if you’re dealing with lower back sensitivity.
Keep your hips stable and let the rotation come from your mid-back. Breathe out as you twist, breathe in as you return to center. This rhythmic breathing pattern helps relax your muscles and calm your nervous system. Again, control matters more than range of motion.
Scapula Pulls
Scapula pulls involve a simulated overhead pull motion, focusing on shoulder blade engagement. Imagine you’re grabbing an invisible barbell above your head and pulling it down toward your chest. Your arms stay slightly bent throughout—around 40 to 45 degrees.
This controlled up-and-down movement activates the muscles that stabilize your shoulder blades, including your rhomboids and lower traps. These muscles are crucial for maintaining proper posture during rowing exercises. Therefore, don’t skip this step even though it feels simple.
Good Mornings (Bodyweight)
Good mornings are a hip hinge movement performed without weight during the warm-up. Keep your legs steady and your back neutral. Hinge forward at the hips, lowering your torso toward the floor, then return to standing.
Breathing cues matter here: exhale as you hinge down, inhale as you come up. This pattern supports spinal stability and prevents you from holding your breath, which can spike blood pressure unnecessarily. Perform these slowly and deliberately for about 30 seconds.
Standing Y Raises
Finally, finish your warm-up with standing Y raises. Your arms form a “Y” shape at the top of the movement, activating your upper back, shoulders, and lower back. This exercise ties together everything you’ve done so far, preparing your entire posterior chain for work.
Use a controlled tempo. Raise your arms smoothly, pause briefly at the top, then lower them just as smoothly. You should feel your muscles engaging without strain or discomfort. If you feel pain—especially sharp or shooting pain—stop immediately and reassess your form.
Do you feel warmer and more alert after these movements? That’s exactly what we’re going for. Your body is ready for the main session.
Main Workout Session: Full Back Activation
Training Philosophy During the Main Session
During the main session, technique and control trump heavy loading every single time. I’ve worked with enough patients dealing with preventable injuries to know that ego lifting leads nowhere good. Instead, focus on slow, intentional repetitions. Squeeze your muscles at the top of each movement and coordinate your breathing with the exercise.

This approach builds real strength—the kind that translates to everyday life. Moreover, it protects your joints and connective tissue, allowing you to train consistently over years rather than burning out in weeks. Can you commit to this philosophy even when your mind wants to go heavier? That commitment separates sustainable progress from short-term gains followed by long-term setbacks.
Bent-Over Dumbbell Row
The bent-over dumbbell row is a classic compound back exercise that targets your lats, rhomboids, and traps simultaneously. Start by hinging at the hips, keeping your chest forward and shoulders back. Your back should be nearly parallel to the floor but not fully horizontal.
Pull the dumbbells toward your hips, focusing on lat engagement rather than arm strength. Think about pulling your elbows back and squeezing your shoulder blades together at the top. Hold that squeeze for a one- to two-second pause before lowering the weights with control.
Breathe out as you pull up, breathe in as you lower down. This rhythm keeps your core engaged and your spine stable. Additionally, avoid rounding your lower back. If you find yourself rounding, reduce the weight or decrease your forward lean slightly. Form always comes first.
Single-Arm Dumbbell Row
Right Side
The single-arm dumbbell row allows you to focus on one side at a time, which helps identify and correct imbalances. Start with your right arm. Place your left hand on your left knee for support. Your torso should be angled forward but stable.
Pull the dumbbell up toward your hip, driving your shoulder down before initiating the pull. At the top, squeeze hard for two full seconds. One, two, then lower with control. This deliberate tempo maximizes muscle tension and builds strength more effectively than rushing through reps.
Left Side
Switch to your left arm using the same movement pattern. Place your right hand on your right knee for support. Reinforce symmetry and control by maintaining identical form on both sides. Don’t rush or compensate if one side feels weaker.
Continued emphasis on breathing keeps you present in each rep. It’s easy to hold your breath during hard work, but doing so limits your performance and increases injury risk. Therefore, stay mindful of your breathing throughout every set.
Standing Reverse Fly
For the standing reverse fly, use your lighter dumbbells. This exercise targets your upper back and traps, particularly the muscles between your shoulder blades. Keep your core engaged and your back locked in a neutral position.
Hinge forward slightly at the hips, then raise the dumbbells out to your sides in a “flying” motion. Squeeze at the top, focusing on contracting your upper back rather than just moving the weights. Lower with control and repeat. This movement builds the upper back definition that contributes to a complete, balanced physique.
Bent-Over Reverse Grip Rear Fly
This variation of the reverse fly increases rear delt and upper back activation. Grab your lighter dumbbells with a reverse (underhand) grip. Bend forward at the hips and keep your chest forward throughout the movement.
Raise the dumbbells out to your sides and slightly back, emphasizing the contraction in your rear delts and upper traps. This subtle shift in grip changes the muscle recruitment pattern, hitting areas that the standard reverse fly might miss. Consequently, including both variations ensures comprehensive upper back development.
Close-Grip Single Dumbbell Row (Lower Lats)
This exercise targets your lower lat region, which contributes to that desirable V-taper. Use a heavier dumbbell cautiously, especially if you have lower back concerns. I personally manage lower back discomfort, so I’m always careful with this movement.
Hold one dumbbell with both hands. Hinge forward, then pull the weight toward your lower abdomen. Squeeze hard for two seconds at the top, focusing on engaging your lower lats. If you feel excessive strain in your lower back, reduce the weight immediately. Discomfort is a signal, not a challenge to overcome.
Dumbbell Deadlift
The dumbbell deadlift is a hip hinge movement that activates your full posterior chain—lower back, glutes, hamstrings, and upper back. Hold a dumbbell in each hand, stand with feet hip-width apart, and hinge at the hips while keeping your back neutral.

Control the descent, feeling the stretch in your hamstrings. Then, drive through your heels and squeeze your glutes and back as you return to standing. This powerful movement builds functional strength that carries over to daily activities like lifting groceries or picking up kids.
⚡ Pro Tip: Think “push the floor away with your feet” during the upward phase of the deadlift. This cue helps you engage your legs and glutes more effectively.
Seal Row (Standing Variation)
The seal row is a face-forward rowing movement that focuses on your upper back and traps. If you have lower back sensitivity, use lighter weight to avoid excessive strain from leaning forward. The goal is muscle engagement, not heroic weight.
Pull the dumbbells toward your torso while keeping your body stable. Squeeze your shoulder blades together at the top, then lower with control. This variation builds upper back thickness and strength while minimizing lower back stress when performed correctly.
Dumbbell Pullover (Floor-Based)
Lie on your back with knees bent for the dumbbell pullover. Hold a dumbbell between your arms, extending it above your chest. Lower the weight back over your head in an arc, feeling the stretch in your lats and chest.
Keep your lower back slightly elevated off the mat. This position engages your core and lats more effectively than lying completely flat. Pull the weight back to the starting position, focusing on lat contraction rather than arm strength. This classic exercise builds upper back width and improves shoulder mobility.
Renegade Row
Right Side
The renegade row is a plank-based rowing movement that challenges your core stability and back strength simultaneously. Start in a high plank position with hands gripping dumbbells. Keep your core tight to avoid shifting side to side.

Row one dumbbell toward your hip while keeping the opposite hand firmly planted. Your hips should stay square to the floor. This requires significant core engagement, which is why the renegade row is such an effective total-body exercise. Start with your right arm, performing rows for 30 seconds.
Left Side
Switch to your left arm using the same execution principles. This variation can feel significantly harder on your non-dominant side. Embrace the challenge rather than fighting it. Increased difficulty signals areas where you can improve, which is valuable information for your training.
Dumbbell Shrugs
Dumbbell shrugs target your traps, the muscles that run from your neck down to your mid-back. Hold a dumbbell in each hand, then shrug your shoulders straight up toward your ears. Hold the contraction for two full seconds at the top.
Lower your shoulders with control rather than dropping them. This controlled drop maintains tension in your traps throughout the set, maximizing muscle growth and strength development. Additionally, avoid rolling your shoulders forward or backward during shrugs—straight up and down is the safest and most effective path.
Upright Rows
For upright rows, keep your elbows at approximately 90 degrees as you pull the dumbbells up along the front of your body. Chest stays lifted and shoulders stay back throughout the movement. If you have shoulder concerns, use lighter weights or skip this exercise entirely.
Pull the dumbbells up to around chest height, pause briefly, then lower with control. This exercise targets your traps, upper back, and shoulders. However, it can be tough on shoulder joints if performed with poor form or excessive weight, so prioritize technique above all else.
Good Mornings with Dumbbell
Good mornings with a dumbbell add resistance to the hip hinge pattern you practiced during the warm-up. Place a dumbbell behind your neck, resting on your upper traps. Keep your legs locked in a slight bend—not completely straight, which strains your knees, but not deeply bent either.
Hinge forward slowly, feeling the stretch in your hamstrings and the engagement in your lower back. This exercise builds lower back strength and reinforces the hip hinge pattern essential for deadlifts and daily activities. Move deliberately and breathe consistently throughout each rep.
Post-Workout Stretching and Recovery
Importance of Post-Workout Stretching
Post-workout stretching reduces muscle tension that accumulates during training. Tight muscles pull on joints and connective tissue, leading to imbalances and discomfort over time. Additionally, stretching improves mobility, which enhances your performance in future workouts and daily activities.
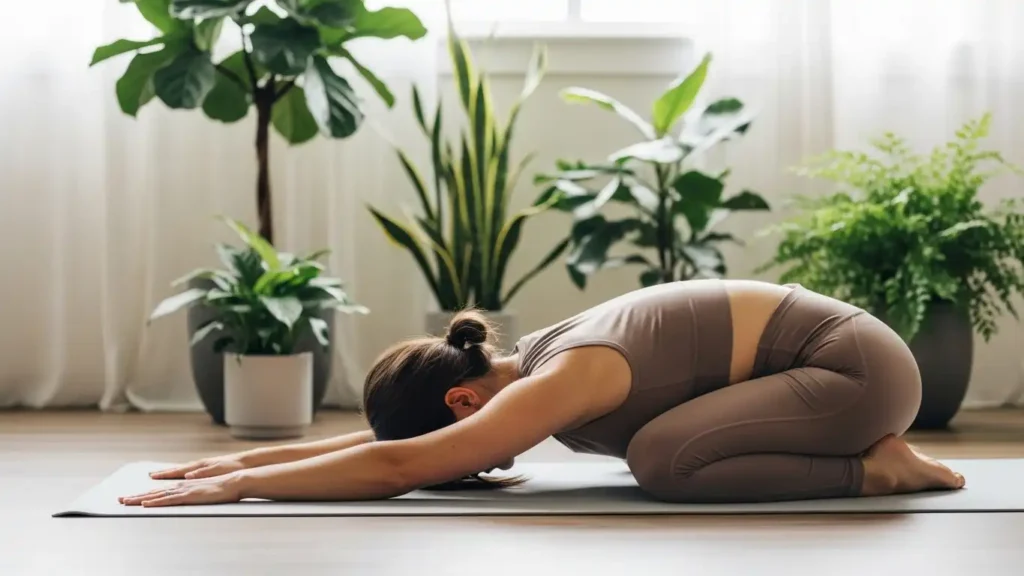
Finally, proper stretching supports recovery by promoting blood flow and helping remove metabolic waste products from your muscles. Think of stretching as an investment in tomorrow’s training session. What you do today determines how well you move and feel tomorrow.
Child’s Pose
Start your stretching routine with child’s pose, a full back stretch that targets your lower, middle, and upper back simultaneously. Kneel on the floor, sit back on your heels, then extend your arms forward and lower your chest toward the floor.
Hold this position for 30 seconds, breathing deeply and allowing your body to relax into the stretch. You should feel gentle tension along your entire spine. This restorative pose is probably one of the most effective back stretches available, which is why it appears in yoga, physical therapy, and strength training contexts.
Cat-Cow Stretch
The cat-cow stretch is a spine mobility exercise that alternates between spinal flexion and extension. Start on your hands and knees in a tabletop position. Arch your back upward like a cat, then let it sag downward like a cow.
Move through this sequence slowly and rhythmically, coordinating your breath with the movement. Inhale during cow, exhale during cat. This pattern promotes spinal flexibility and releases tension built up during the workout. Moreover, the gentle, rhythmic movement calms your nervous system, transitioning you from work mode to recovery mode.
Thread-the-Needle Stretch
Right Side
Thread-the-needle is a lat-focused stretch performed on hands and knees. Thread your right arm under your left arm, lowering your right shoulder and the side of your head to the floor. Your right lat should feel a deep stretch.
Hold this position for 30 seconds, breathing slowly and deeply. Don’t force the stretch. Simply allow gravity and time to gently increase your range of motion. This patience-based approach to stretching produces better results than aggressive forcing.
Left Side
Switch to your left side and repeat. You might notice natural side-to-side flexibility differences. Most people do. One side is usually tighter than the other, often related to hand dominance or compensatory movement patterns. Don’t judge these differences—simply notice them and work within your current capacity.
Standing Forward Hang Stretch
For the standing forward hang stretch, stand with feet hip-width apart and fold forward at the hips. Let your hands hang toward the floor, or grab opposite elbows and let your upper body hang.
This position creates decompression through your spine, gently stretching your lower back, mid-back, and upper back. Hold for 30 seconds while breathing deeply. If you feel lightheaded, come up slowly. The increased blood flow to your head during this stretch can occasionally cause temporary dizziness.
Cross-Body Shoulder Stretch
Finally, perform a cross-body shoulder stretch on each side. Pull your right arm across your body with your left hand. Hold for 15 seconds, then switch to your left arm for 15 seconds.
Emphasize breathing and relaxation rather than forcing a deeper stretch. The goal is to release tension, not create more. As you breathe out, imagine tension flowing out of your muscles. This mental component of stretching is just as important as the physical position.
Closing Message and Motivation
Congratulations for completing this workout. Seriously. You showed up, you worked hard, and you invested in yourself. That matters more than perfect form, optimal weight selection, or hitting every rep flawlessly. Consistency beats perfection every single time.
As someone who spends most of my professional life helping people navigate sensitive health challenges, I know how powerful it feels to take control of one aspect of your wellbeing. Exercise builds physical strength, yes, but it also builds confidence, resilience, and the belief that you can handle difficult things. Those qualities translate to every area of life.
Moreover, I want you to see this workout as a starting point, not a destination. Maybe you share it with friends or family who need motivation. Maybe you return to it weekly as a reliable back-building routine. Maybe you modify it based on your own needs and preferences. Whatever you choose, you’re building something sustainable.
If you enjoyed this workout, I encourage you to share it with your community. Fitness is better together, and everyone deserves access to effective, accessible training regardless of equipment or experience. Additionally, share your feedback. How did the workout feel? What exercises challenged you most? What would you like to see next?
Finally, remember that optional membership resources and communities exist to support your journey if you want more structure, accountability, or personalized guidance. But whether you train alone, with friends, or with a coach, the most important thing is that you keep moving forward.
You’ve got this. I believe in you. Now go rest, recover, and come back stronger next time.
Comparison Table: Workout Benefits vs. Traditional Gym Training
| Feature | Dumbbell-Only Back Workout | Traditional Gym Back Training |
|---|---|---|
| Equipment Required | Two pairs of dumbbells only | Bench, barbell, cable machine, pull-up bar |
| Space Needed | Small home area (6×6 feet) | Full gym membership or large home gym |
| Time Commitment | 20 minutes total | 45-60 minutes including travel |
| Cost | One-time dumbbell purchase | Monthly membership fees |
| Lower Back Safety | Highly customizable, lighter loads | Can be risky with heavy machines |
| Accessibility | Train anytime at home | Limited by gym hours |
| Learning Curve | Simple, beginner-friendly | Requires machine knowledge |
| Effectiveness | High (with proper form) | High (with proper form) |
| Convenience | Maximum | Requires travel time |

 By
By
 By
By
 By
By

 By
By


